You would think uploading a small picture of your own signature would be the easiest part of an online application. Usually it is the step that keeps you stuck at midnight.
You sign a piece of paper, snap a quick photo with your phone, drop it into the form, and get hit with a vague red banner: Invalid dimensions, File must be between 10 KB and 20 KB, or Signature too blurred to read. Even worse, some portals accept the upload on screen and fail it weeks later during manual document checks because the strokes look squished or tiny inside a sea of gray paper.
After building our own signature tools and checking over 40 official portal specifications across civil service commissions, national banks, tax portals, and university admissions systems, the same handful of technical mismatches show up almost every single time. Most of the confusion comes down to one simple translation error between centimeters on paper, pixels on screen, and DPI metadata inside the file header.
Important
Short answer: A 6 × 2 cm signature at 300 DPI equals 709 × 236 pixels. Sign plain white unlined paper with dark ink, crop tight around the strokes, resize in PdfPixels Resize Signature (6 × 2 cm at 300 DPI), then save as a 10–20 KB JPEG if the portal requires .jpg.
Pro Tip
Fix your signature right now: Open Resize Signature, upload your signature scan or phone photo, and pick the 6 × 2 cm at 300 DPI preset. Need .jpg format, an explicit DPI metadata header, or a strict 10–20 KB ceiling? Finish with PNG to JPEG, Convert DPI, and Compress Image—100% free with no watermarks.
Why "6 × 2 cm at 300 DPI" Trips Up So Many People
Print instructions and web forms speak two different languages.
When an agency like the Staff Selection Commission (SSC) writes "6.0 cm × 2.0 cm" in a notification PDF, that wording was originally written for flatbed scanners back when applicants scanned paper boxes at a set resolution. Modern browser upload validators do not hold a plastic ruler against your screen. Instead, their server code checks some mix of three numbers:
- Exact pixel width and height (or a narrow aspect-ratio range close to 3:1).
- Embedded DPI metadata inside the JPEG or PNG file header.
- File weight in kilobytes (frequently a tight band like 10 KB to 20 KB, not just a maximum limit).
To convert centimeters into pixels, divide by 2.54 (the exact number of centimeters in an inch) and multiply by the target DPI:
Width in pixels = (6.0 ÷ 2.54) × 300 = 708.66 → 709 px
Height in pixels = (2.0 ÷ 2.54) × 300 = 236.22 → 236 px
That calculation explains why searching online gives three conflicting answers for the exact same "6 × 2 cm" rule. Depending on which DPI assumption a blog or software default uses, the pixel dimensions change completely.
| Target Print Size | 100 DPI (Legacy Screen) | 150 DPI (Basic Scan) | 200 DPI (PAN / Exam Alt) | 300 DPI (Print / Strict Standard) | Aspect Ratio |
|---|---|---|---|---|---|
| 6.0 × 2.0 cm | 236 × 79 px | 354 × 118 px | 472 × 157 px | 709 × 236 px | 3:1 |
| 4.5 × 2.0 cm | 177 × 79 px | 266 × 118 px | 354 × 157 px | 531 × 236 px | 2.25:1 |
| 4.0 × 2.0 cm | 157 × 79 px | 236 × 118 px | 315 × 157 px | 472 × 236 px | 2:1 |
| 3.5 × 1.5 cm | 138 × 59 px | 207 × 89 px | 276 × 118 px | 413 × 177 px | 7:3 |
| 3.0 × 1.0 cm | 118 × 39 px | 177 × 59 px | 236 × 79 px | 354 × 118 px | 3:1 |
| Fixed Web Box (IBPS) | N/A | N/A | N/A | 140 × 60 px (pixel-locked) | 7:3 |
If you want a deeper breakdown of how pixel dimensions interact with the metadata tag, read Image DPI Explained: Print vs Web before changing DPI numbers blindly.
Advertisement
40+ Government, Banking, and Tax Portal Signature Specs Compared
One signature file rarely fits two different portals without checking the notice first. When we reviewed signature guidelines across recruitment commissions, bank onboarding workflows, and identity authorities, dimensions split into four distinct buckets.
| Portal / Category | Signature Dimensions | Typical DPI | File Size Window | Required Format | Best PdfPixels Workflow |
|---|---|---|---|---|---|
| SSC Portals (CGL, CHSL, MTS, GD) | 6.0 × 2.0 cm (or 4.0 × 2.0 cm on select annexes) | 200–300 DPI | 10 KB – 20 KB | JPG / JPEG | SSC Photo & Signature Resizer or Resize Signature |
| Banking Recruitment (IBPS PO/Clerk, SBI, RBI) | 140 × 60 px (approx. 3.5 × 1.5 cm) | 200 DPI | 10 KB – 20 KB | JPG / JPEG | IBPS Photo & Signature Tool / SBI Tool |
| PAN Card (Protean / NSDL Form 49A) | 4.5 × 2.0 cm | 200 DPI | Up to 10–50 KB | JPG / JPEG | NSDL PAN Resizer + Resize Image |
| Railways (RRB NTPC, Group D, ALP) | 5.0 × 2.0 cm or 4.0 × 2.0 cm | 200–300 DPI | 10 KB – 40 KB | JPG / JPEG | RRB NTPC Resizer |
| UPSC Civil Services & NDA/CDS | 350 × 350 px to 1000 × 1000 px band | 200–300 DPI | 20 KB – 300 KB | JPG / JPEG | UPSC Photo & Signature Tool |
| Combined Exam Uploads (Photo + Signature) | 140 × 60 px or custom composite | 200 DPI | Under 20–50 KB | JPG / JPEG | Merge Photo & Signature |
| Bank Account KYC / ACH & Mandate PDFs | Custom box (often 6 × 2 cm or 3 × 1 cm) | 300 DPI | Under 100 KB (or embedded in PDF) | PNG or PDF | Resize Signature → Sign PDF |
Notice the pattern across every official portal listed above: white paper, dark ink, clean horizontal framing, and running handwriting rather than ALL CAPS. Even on portals like UPSC or Protean PAN that allow bigger kilobyte ranges, uploading an uncropped 4000 × 3000 px camera photo almost always hits an upload error or leaves the signature illegible inside the generated application PDF.

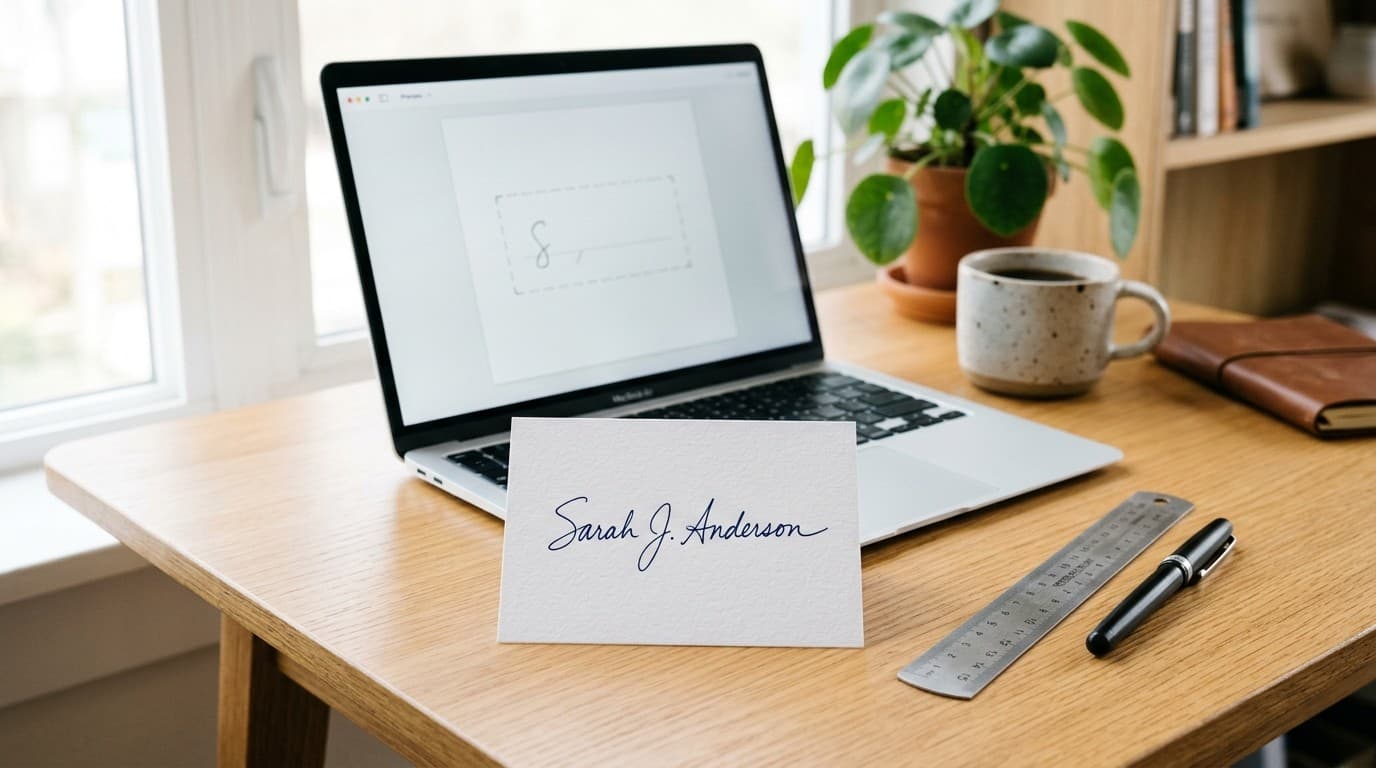
Overhead flat-lay showing how to measure, photograph, and resize a handwritten signature to 6x2 cm at 300 DPI for online forms
Step 1: Capture the Cleanest Original Before Touching Any Tool
Software cannot rescue a bad photo of ink on creased paper. Spending 60 seconds getting a clean source shot saves ten minutes of fighting compression artifacts later.
- Use plain white copy paper, never lined notebook sheets. Faint blue notebook lines eat up JPEG compression budget and can fail automated background checks.
- Sign with a standard black or dark-blue ballpoint pen. Gel pens and thick felt markers bleed into cheap paper fibers, while extra-fine 0.3 mm fountain pens vanish when shrunk down to 140 × 60 px or compressed to 12 KB.
- Write naturally, never in block capitals. Recruitment boards like SSC and banking authorities explicitly reject signatures written in separate capital letters, treating them as invalid specimen marks.
- Shoot near a window in daylight, directly overhead. Warm kitchen ceiling lights turn white paper dingy yellow-gray and cast a phone shadow right across your middle initial. Holding the phone parallel to the paper prevents trapezoidal skew.
If you do not have paper or a pen nearby and the form allows an electronic drawn signature (common on HR onboarding, vendor forms, and banking mandates), you can sketch one directly in Signature Maker and export a transparent PNG first.
Step 2: Crop Tight to the Ink Strokes First
This is the single most common reason people pass pixel checks yet get rejected on manual verification.
Suppose your phone camera shoots at 4032 × 3024 pixels and your signature sits in the middle, covering maybe 15% of the page width. If you feed that uncropped photo straight into a 6 × 2 cm (709 × 236 px) resizer, the signature itself shrinks to roughly 100 × 35 px surrounded by huge empty borders. Portals call this a miniature signature, and automated or human reviewers reject it immediately.
Open Crop Image first and drag the crop box close to your ink strokes—leave only 3 to 5 millimeters of breathing room on all four sides, matching a roughly 3:1 horizontal rectangle so nothing gets stretched or squeezed later.
If your source photo has uneven gray shadows around the paper edge and the portal permits a clean transparent or pure-white cutout, running Remove Background before cropping gives sharp black-on-white contrast without muddy gray gradients.
Advertisement
Step 3: Resize to 6 × 2 cm at 300 DPI in Your Browser
Once your signature is tightly cropped, open PdfPixels Resize Signature. Because this tool runs directly inside your browser using the HTML5 Canvas API, your handwritten signature never gets uploaded or stored on a remote server.
Here is the exact workflow inside the tool:
- Upload your cropped signature image into the dropzone.
- Choose your size preset from the dropdown menu:
- 6 × 2 cm at 300 DPI outputs exact 709 × 236 pixels, fitting your signature cleanly inside the frame without distorting letter proportions.
- 3 × 1 cm at 300 DPI outputs 354 × 118 pixels for compact ID cards or smaller document boxes.
- 600 × 200 px exports a crisp 3:1 web-ready size for modern portals that specify pixel bounds instead of centimeters.
- Custom scale % scales proportionally from 10% to 90% when you just need a smaller copy without forcing a 3:1 box.
- Click Resize signature and inspect the checkerboard preview to make sure no ascenders or loops touch the outer boundary.
- Download PNG to save your lossless master signature file.
Need an exact non-3:1 centimeter spec such as 4.0 × 2.0 cm or 4.5 × 2.0 cm at 200 DPI? Use PdfPixels Resize Image, switch the unit selector to cm, set DPI to 200 or 300, and enter your custom width and height directly. You can also check our dedicated Resize Image in CM guide for quick print-size conversions.
Step 4: Match Format (.JPG), 300 DPI Metadata, and 10–20 KB File Size
Notice that Step 3 downloads a clean PNG (709 × 236 px). That is deliberate: PNG keeps thin pen strokes razor-sharp without adding blocky compression halos, and preserves transparency if you plan to place the signature onto a PDF form later.
However, government exam portals and legacy bank forms frequently reject .png uploads or enforce strict 10 KB – 20 KB .jpg rules—and some older ASP.NET or Java form validators read the file's embedded DPI metadata tag rather than just counting pixels.
When a portal requires JPG, an explicit 300 DPI header, or a tight kilobyte band, run these quick follow-ups depending on what your portal asks for:
Converting PNG to a White-Background JPEG
Do not rename .png to .jpg in Windows Explorer or macOS Finder—portals check magic bytes inside the file header and reject renamed PNGs immediately.
Run your resized PNG through PdfPixels PNG to JPEG. PdfPixels automatically flattens transparent pixels onto pure solid white (#FFFFFF) before writing a standard baseline JPEG, so your signature never develops a black or purple box on upload. If you want to understand why transparency turns dark in naive converters, see our PNG to JPG Converter guide.
Embedding an Explicit 300 DPI (or 200 DPI) Header
HTML5 Canvas exports standard PNG files without a custom print-resolution chunk (pHYs in the W3C PNG Specification). Most modern websites ignore that header and check only 709 × 236 px, but if a government validator throws a "Resolution must be 300 DPI" error, open PdfPixels Convert DPI, set your target dimensions in cm (6 × 2) and DPI (300), and download—the processor writes the explicit 300 DPI density header directly into the JPEG or PNG file.
Hitting Strict 10 KB – 20 KB Targets (Too Big or Too Small)
Once you have a 709 × 236 px white-background JPEG:
- If the file is over 20 KB: Open PdfPixels Compress Image (or follow our Compress Image to 20KB checklist), type
16or18KB as your target size, and download. Aiming slightly below the 20 KB ceiling avoids rejection caused by rounded binary KB vs decimal kB math on form servers. - If the file is under 10 KB: Clean black-on-white
709 × 236JPEGs occasionally compress down to 6–8 KB, which triggers "Minimum file size 10 KB" errors on SSC and IBPS forms. Run the file through PdfPixels Increase Image Size with a14KB target—it brings the file into the valid 10–20 KB window without blurring or stretching your709 × 236pixel grid.
For photo uploads accompanying the same form, our walkthroughs on reducing photo file size on any device and resizing photos to 600 × 600 px for visas and lotteries follow the exact same order: crop first, set exact pixels second, tune KB last.
Banking KYC, Mandates, and Signature Security: Why Local Processing Matters
Resizing a picture for a hobby blog is low risk. Uploading a crisp, high-resolution scan of your legal handwritten signature to a random ad-heavy website on the internet is a completely different story.
Your specimen signature is a primary verification artifact used across wire transfer authorizations, checking accounts, tax returns, corporate board resolutions, and notarized loan packages. Under the US ESIGN Act (15 U.S.C. § 7001) and identity verification frameworks like NIST Digital Identity Guidelines, keeping control over how and where your signature image is transmitted and stored reduces unauthorized reuse.
That is why PdfPixels Resize Signature and Signature Maker execute locally inside your own browser tab:
- Zero remote file retention during local canvas resizing—your ink strokes stay in local RAM and vanish when you close the tab.
- Clean master reuse across banking and legal PDFs: Keep the
709 × 236 pxtransparent PNG master in a private folder on your computer. Whenever a bank sends an ACH mandate, onboarding packet, or NDA PDF, drop that clean PNG directly onto the signature line using PdfPixels Sign PDF—no printing, signing, and re-scanning required. You can read our step-by-step guide to signing PDFs online free or signing directly from your phone for mobile workflows. - One-click photo + signature composites: When an admission portal or scholarship form demands your portrait and signature merged inside a single file instead of two separate boxes, combine your Passport Photo Maker output and your resized signature with Merge Photo & Signature—covered in detail in our combined photo and signature guide.
7 Silent Signature Rejections (and How to Fix Each One Fast)
When a portal rejects your file without saying why, check this list from top to bottom:
- You uploaded a
.pngfile renamed to.jpg. Form servers inspect the binary signature bytes (FF D8 FFfor JPEG vs89 50 4E 47for PNG). Always convert with PNG to JPEG instead of renaming extensions. - Your signature fills less than half the box. Re-crop tightly around the strokes in Crop Image before resizing so the signature spans 75–85% of the
6 × 2 cmcanvas. - File weight landed at 20.4 KB on Windows (which shows "20 KB" in Explorer). Compress to
16–18 KBin Compress Image so rounded OS display sizes never fool you. - File weight landed at 7 KB (below a 10 KB minimum). Use Increase Image Size targeting
14 KBto stay safely inside10–20 KB. - The portal checks explicit DPI metadata. Run the resized image through Convert DPI at
300 DPI(or200 DPIfor PAN/select forms) so the JFIF/EXIF density header matches. - You signed in ALL CAPITAL letters or pale pencil. Many civil service and banking systems disqualify block-letter signatures automatically. Re-sign in running handwriting using black ballpoint ink on unlined paper.
- Weird filename characters or spaces. Rename your final file cleanly to something plain like
signature-6x2cm.jpgbefore hitting upload—older government portals sometimes choke on parentheses,#, or extra dots in filenames likescan (1).final.jpg.
Keep One Clean Master Copy and You Never Have to Redo This
Once you capture one sharp, shadow-free signature on plain white paper, crop it tightly, and save both a lossless 709 × 236 px PNG master and a 15 KB JPEG copy, you are effectively done for years. From that single master you can generate any portal variant—6 × 2 cm for SSC, 140 × 60 px for banking applications, 4.5 × 2 cm for tax filings, or transparent overlays inside Sign PDF—in less than thirty seconds whenever another form pops up.
Start with PdfPixels Resize Signature right in your browser, keep your ink crisp, and stop letting picky form uploaders hold up your applications.
Advertisement
Topics
Yuvi Parmar
Founder & Lead EngineerYuvi Parmar is the founder and lead systems architect of PdfPixels. Specializing in high-performance browser computing, WebAssembly document tooling, and media compression pipelines, all guides and technical tutorials undergo rigorous empirical testing across Windows, macOS, iOS, and Android to ensure absolute workflow accuracy.
Advertisement
FAQFrequently Asked Questions
How many pixels is 6 × 2 cm at 300 DPI?
A 6.0 cm × 2.0 cm signature at 300 DPI equals 709 × 236 pixels, calculated as (6 ÷ 2.54) × 300 = 708.66 and (2 ÷ 2.54) × 300 = 236.22. At 200 DPI, the same 6 × 2 cm size equals 472 × 157 pixels.
How do I resize my signature to 6 × 2 cm under 20 KB for free?
Crop tightly around your handwritten strokes using Crop Image, resize it with the 6 × 2 cm at 300 DPI preset in PdfPixels Resize Signature (709 × 236 px), convert to white-background JPG via PNG to JPEG if required, and compress to 15–18 KB using Compress Image.
Why did my signature pass 709 × 236 pixels and still get rejected?
Common reasons include uploading a PNG renamed to .jpg instead of a true JPEG, missing 300 DPI metadata (fixable with Convert DPI), file size falling under a 10 KB minimum or slightly above 20 KB, signing in all capital letters, or leaving huge blank margins around a tiny signature.
What if my resized 6 × 2 cm signature JPEG is under 10 KB?
Clean black-on-white signatures sometimes compress down to 6–8 KB, which fails portals with a 10 KB minimum upload floor. Open PdfPixels Increase Image Size, set a target around 14 KB, and export without altering your 709 × 236 pixel dimensions.
Should I upload a PNG or JPG signature to government and banking forms?
Most government exam, tax, and banking portals (such as SSC, IBPS, SBI, RRB, and Protean PAN) explicitly require JPEG/JPG on a plain white background. Keep a transparent PNG master for signing PDFs in Sign PDF, and export a white-background JPEG for form portals.
Is it safe to resize my personal signature on PdfPixels?
Yes. PdfPixels Resize Signature runs directly inside your browser using the HTML5 Canvas API, so your signature image stays in local device memory and is never saved on remote servers.